Make Authentic Egg Pasta By Hand: Dough to Drying
There's a unique satisfaction that comes from creating something delicious with your own hands, and making fresh pasta is undoubtedly one of life's most rewarding culinary experiences. Forget preconceived notions of complexity; crafting authentic egg pasta from scratch is surprisingly simple, deeply meditative, and yields a product far superior to anything store-bought. This comprehensive guide will walk you through *how to make homemade pasta egg pasta* using just two core ingredients and a simple process, proving that a pasta machine is entirely optional. From mixing your dough to rolling, shaping, and even drying for future enjoyment, prepare to embark on a journey that will transform your kitchen into a little corner of Italy.
The Foundation: Perfecting Your Egg Pasta Dough
The magic of homemade egg pasta begins with its deceptively simple ingredient list: flour and eggs. Yet, within this simplicity lies a world of nuanced choices that can elevate your final product.
Choosing Your Flour: The Heart of the Dough
While many recipes call for specific flour types, understanding their properties will empower you to make informed decisions.
*
00 Flour: The Italian Classic
* Often lauded as the gold standard for fresh pasta, 00 flour is a finely milled Italian wheat flour. Its "00" designation refers to its very fine grind and low bran content, not necessarily its protein level. This fine texture results in a silky, tender pasta that cooks quickly and has a delicate chew.
*
Tip: If you're new to pasta making, 00 flour is an excellent starting point for consistently tender results.
*
All-Purpose Flour: A Practical Alternative
* Don't have 00 flour on hand? Standard all-purpose (AP) flour can certainly be used. However, expect a slightly chewier texture and potentially longer cooking times due to its higher protein content and coarser grind compared to 00 flour. It's a perfectly acceptable substitute, especially for rustic or heartier sauces.
*
Beyond 00: Semolina and Durum Flours
* Many Italian home cooks, especially in the south, often incorporate or exclusively use semolina (semola) flour or durum flour. Both are derived from durum wheat.
*
Semolina Flour: Coarser than 00 flour, semolina offers less elasticity but provides a robust structure, making it ideal for shaped pasta like orecchiette or penne, helping them maintain their form during cooking. It also creates a slightly rougher surface, allowing sauces to cling beautifully.
*
Durum Flour: A finer grind of durum wheat than semolina, durum flour is more pliable and often used for softer pasta shapes like spaghetti or lasagna sheets, or when extruding pasta.
* For an in-depth exploration of flour types and their impact on your pasta, refer to our guide on
Master Fresh Egg Pasta: Flour Guide for Perfect Dough.
The Eggs: Freshness Matters
Just as important as your flour are your eggs. Opt for large, free-range eggs whenever possible. Their richer yolks not only impart a beautiful golden hue to your pasta but also contribute to a superior flavor and a more pliable dough due to their higher fat content.
Basic Egg Pasta Dough Ingredients:
* 600g (approximately 4 ½ cups) 00 flour (or all-purpose flour)
* 6 large free-range eggs
Crafting Your Dough: The Art of Kneading
Whether you opt for the traditional hands-on approach or enlist the help of kitchen gadgets, the goal is to develop the gluten in the flour, resulting in a smooth, elastic, and homogenous dough.
Method 1: The Traditional Hand-Kneading Method
This method is deeply satisfying and truly connects you with the process.
1.
Create a Well: On a clean, flat work surface (like a large cutting board or countertop), pile your flour into a mound. Create a deep, wide well in the center, much like a volcano.
2.
Add Eggs: Crack your eggs directly into the well. Using a fork, gently whisk the eggs, gradually incorporating small amounts of flour from the inner edge of the well. Be careful not to break the "flour wall" too quickly, or your eggs will escape!
3.
Form a Shaggy Dough: Continue to draw flour into the eggs until a shaggy, rough dough forms. Scrape any remaining flour from your work surface and bring it all together into a cohesive ball.
4.
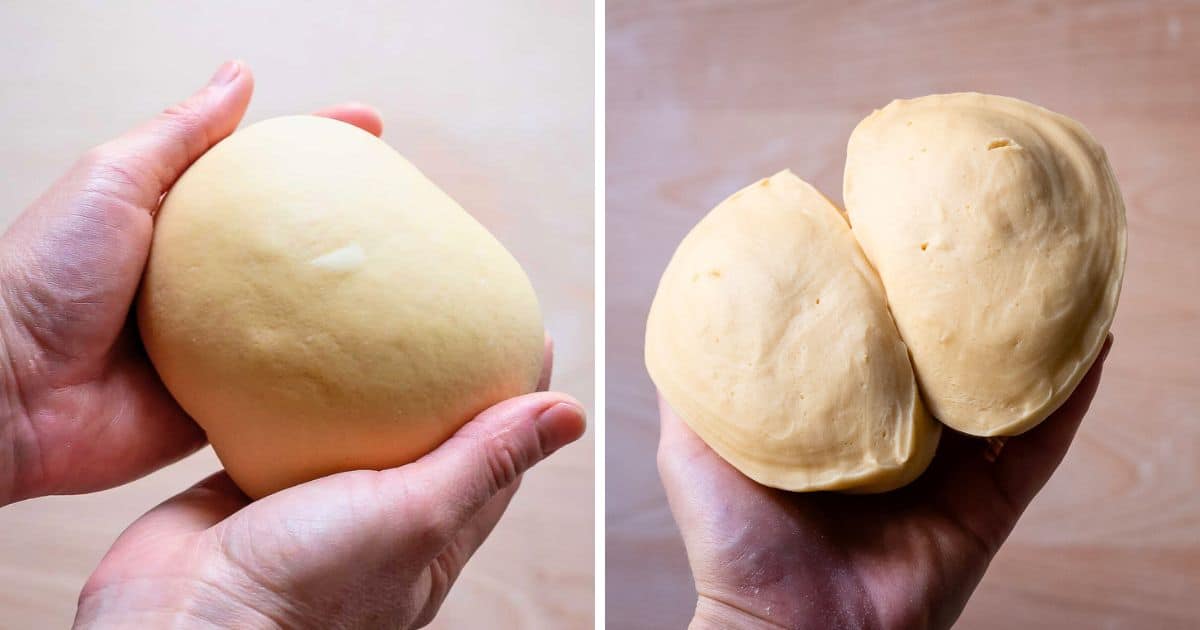
Knead with Love: This is where the magic happens. Begin to knead the dough with the heel of your hand, pushing it away from you, folding it back over, rotating, and repeating. Aim for 8-10 minutes of continuous kneading. The dough will initially be sticky, but as you work it, it will transform into a smooth, elastic, and firm ball. It should feel like a baby's bottom – soft but resilient.
5.
Rest: This step is crucial. Wrap your kneaded dough tightly in plastic wrap or cover it with a damp cloth. Let it rest at room temperature for at least 30 minutes, or up to an hour. Resting allows the gluten to relax, making the dough much easier to roll thinly without tearing. For a more detailed guide on this two-ingredient, no-machine method, see
Homemade Egg Pasta: Two Ingredients, No Machine Needed.
Method 2: Using a Stand Mixer or Food Processor
For those who prefer a less hands-on start, a stand mixer with a dough hook or a food processor can speed up the initial mixing.
*
Food Processor: Place the flour and eggs into the food processor. Pulse until the mixture resembles coarse breadcrumbs. Tip the mixture onto your work surface and bring it together with your hands, then knead for 2-3 minutes to achieve the desired smoothness.
*
Stand Mixer: Combine flour and eggs in the mixer bowl. Using the dough hook attachment, mix on low speed until a shaggy dough forms. Continue to knead for 5-7 minutes until the dough is smooth and elastic. Finish with a quick minute of hand kneading for perfect texture.
Regardless of the method, always ensure your dough rests adequately. This period is non-negotiable for tender, easy-to-work pasta.
Shaping Your Masterpiece: Rolling and Cutting by Hand
Now comes the truly artistic part: transforming your rested dough into elegant pasta shapes. No pasta machine? No problem! A good rolling pin and a sharp knife are all you need.
1.
Prepare Your Workspace: Lightly dust your work surface with flour. Divide your dough into smaller, more manageable portions (e.g., quarters) and keep the unused portions wrapped to prevent drying.
2.
Roll It Out: Take one portion of dough and flatten it slightly with your hands. Using a long, sturdy rolling pin, begin to roll the dough from the center outwards, rotating it frequently and flipping it over occasionally. Apply even pressure, aiming for a consistent thickness.
*
The Goal: You want the dough to be incredibly thin – almost translucent, where you can faintly see your hand through it. This takes practice and persistence, but it's key to delicate pasta. If it starts to shrink back, let it rest for a few minutes, then continue.
3.
Dust, Fold, and Cut (for long pasta): Once your sheet of pasta is rolled out to the desired thinness, lightly dust both sides with a little extra flour to prevent sticking. Allow it to air dry for 5-10 minutes (this helps it maintain shape when cut).
* Carefully fold the sheet of pasta onto itself a few times, creating a compact rectangle or roll.
* Using a sharp knife, slice the folded dough into strips of your desired width. For tagliatelle, aim for about ¼ inch (0.6 cm) wide. For fettuccine, slightly wider. For pappardelle, even wider (about ¾ inch or 2 cm).
* Unfurl the cut strips and gently separate them, dusting lightly with flour if needed to prevent sticking.
4.
Shaping Other Pastas:
*
Lasagna Sheets: Simply cut your thinly rolled dough into desired rectangular sheets.
*
Ravioli/Tortellini: Roll two sheets of pasta, place your filling between them, and use a cookie cutter or knife to cut and seal your filled pasta shapes.
From Fresh to Future: Drying and Storing Your Homemade Pasta
Fresh pasta cooks in mere minutes (typically 1-3 minutes in boiling salted water). However, you might want to prepare a larger batch for future enjoyment.
Short-Term Storage (Fresh)
* If cooking within a day or two, gently coil your freshly cut pasta into small nests or lay flat on a lightly floured baking sheet. Cover loosely with plastic wrap or a slightly damp clean kitchen towel and refrigerate. Dust with extra flour if necessary to prevent sticking.
Drying for Longer Storage
Drying fresh pasta allows you to store it for weeks or even months.
1.
Arrange for Airflow: Hang your freshly cut pasta on a pasta drying rack, clean clothesline, or even over the back of a chair covered with a clean towel. Ensure there’s good air circulation. For nested shapes, spread them out on a floured baking sheet.
2.
Monitor Dryness: Allow the pasta to dry completely. This can take anywhere from 12-24 hours, depending on your climate and pasta thickness. The pasta should feel brittle and snap easily when bent, not bend or feel pliable. Any moisture will lead to mold.
3.
Store: Once thoroughly dry, store the pasta in an airtight container at room temperature, away from direct sunlight. It will keep for several weeks to a few months.
Freezing for Convenience
Freezing is another excellent option for preserving fresh pasta.
1.
Flash Freeze: Arrange freshly cut pasta (either loose strands or nests) in a single layer on a lightly floured baking sheet. Place the baking sheet in the freezer for about 15-30 minutes, or until the pasta is firm but not fully frozen solid.
2.
Transfer to Bags: Once firm, transfer the pasta to airtight freezer bags or containers. This flash-freezing step prevents the pasta from sticking together in one solid clump.
3.
Cook from Frozen: When ready to cook, drop the frozen pasta directly into boiling salted water. It may take an extra minute or two to cook compared to fresh pasta. Frozen pasta can be stored for up to 3 months.
Embrace the Journey
Making authentic egg pasta by hand is more than just a recipe; it's an experience. It's about connecting with centuries of culinary tradition, the joy of simple ingredients, and the immense satisfaction of creating something beautiful and delicious from scratch. With just a few basic ingredients and a willingness to get your hands a little dusty, you can master *how to make homemade pasta egg pasta* and bring the true taste of Italy into your home. So roll up your sleeves, embrace the process, and prepare to savor the unparalleled flavor and texture of truly homemade pasta. Buon appetito!